How To Change Server Location In Hostinger
Last Updated 02 April 2025 by Jarvis Silva
When it comes to website speed your server location matters a lot because closer the server faster it will deliever so it is important to keep your server location close to your audience location.
In Hostinger you can easily change your server location and that is what we will see in this tutorial how to change server location in Hostinger.
At Hostinger, you are allowed to initiate a server transfer once every 30 days.
Changing your server location is typically recommended when your website's primary audience shifts to a different geographic location so without wasting time let's start.
Don't Have A Hostinger Account Yet
Get 70% Discount On Web Hosting Plans + 3 months FREE
Steps To Change Hostinger Server Location
- Login to your Hostinger account and go to Hostinger panel of the website you want to change the server location of.
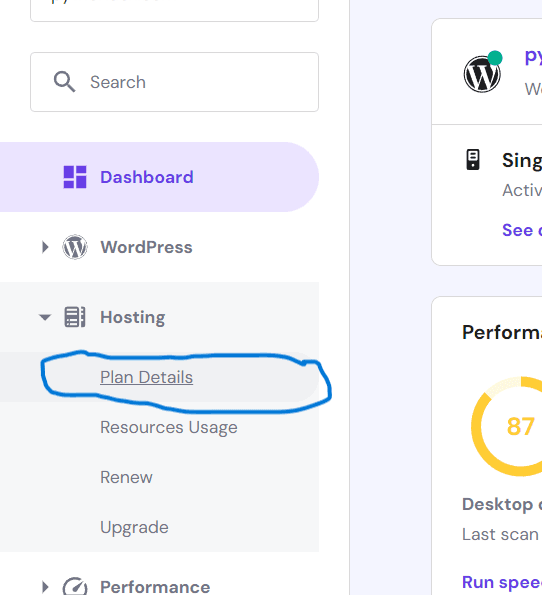
- Click on the hosting tab and under that there will be plan details click on it.
- After going to the hosting plan details page you will see your website and hosting details, the one we want to focus on is Server Details under it you will see server location click on it.
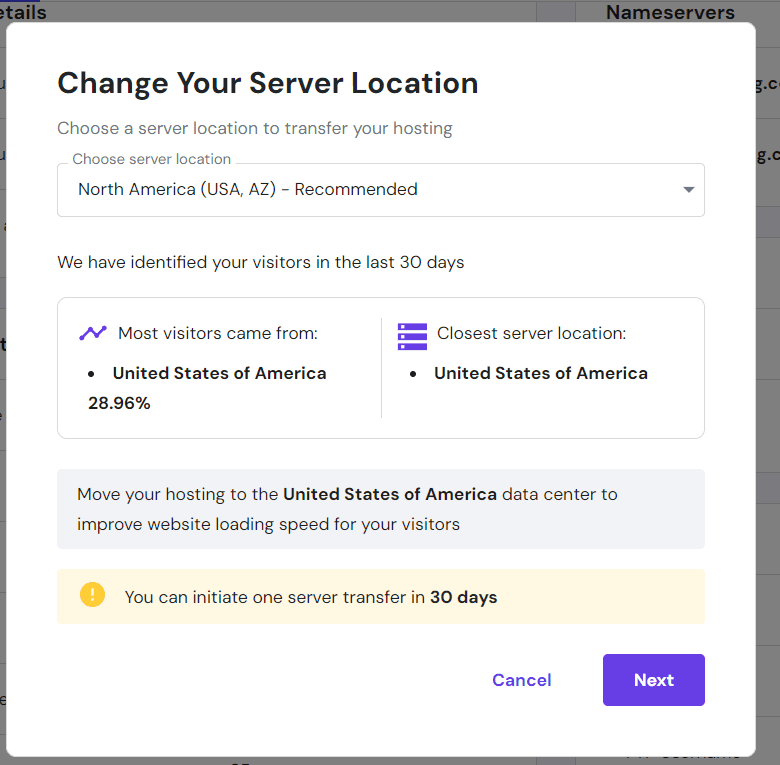
- After clicking on it, it will open a popup with an option to change your server location.
- Hostinger currently has the following server locations:
- North America (USA, AZ)
- Asia (India)
- Asia (Singapore)
- Europe (France)
- Europe (Netherlands)
- Europe (United Kingdom)
- Europe (Lithuania)
- You can choose anyone make sure to choose the closest to your audience geographic location, after choosing click on next
- Your request will be submitted for server location change it can take around 4 hours for Hostinger to transfer your site to new server location.

Note: Your hosting panel will be locked during the transfer process to prevent any changes.
Another important thing is when you change your server location your ip address of the website changes so if your domain is pointing to Hostinger by A record, you will need to update the IP manually
Refer to this tutorial for changing A records: How to update A record.
Summary
So this was the complete tutorial on changing your website server location on hostinger, I hope you were able to successfully follow through this tutorial and change your server location.
Read: How to create subdomain in Hostinger
If you are facing any problems you can contact hostinger support they will help you solve it or even they can migrate the server to another location for you if you don't want to do it yourself.
About the author
I am Jarvis Silva, a tech enthusiast. I have 5 years of experience in website hosting and development, Now sharing all my knowledge related to web hosting and other various tech on the internet through Hostwizly.