How To Purchase Domain And Hosting From Hostinger
Last Updated 06 May 2025 by Jarvis Silva
Looking to start your journey with Hostinger but don't know how to get started then don't worry, In this tutorial I will show step by step how to purchase or buy domain and hosting from Hostinger.
Hostinger provides both web hosting and domain services, One thing I like about Hostinger is that you get a free domain for a year with their hosting plans so your cost of buying a domain is cut.
So now let's see step by step how to get web hosting with a free domain on Hostinger.
Steps To Buy Hosting With Free Domain From Hostinger
- Open your browser and visit Hostinger's website.
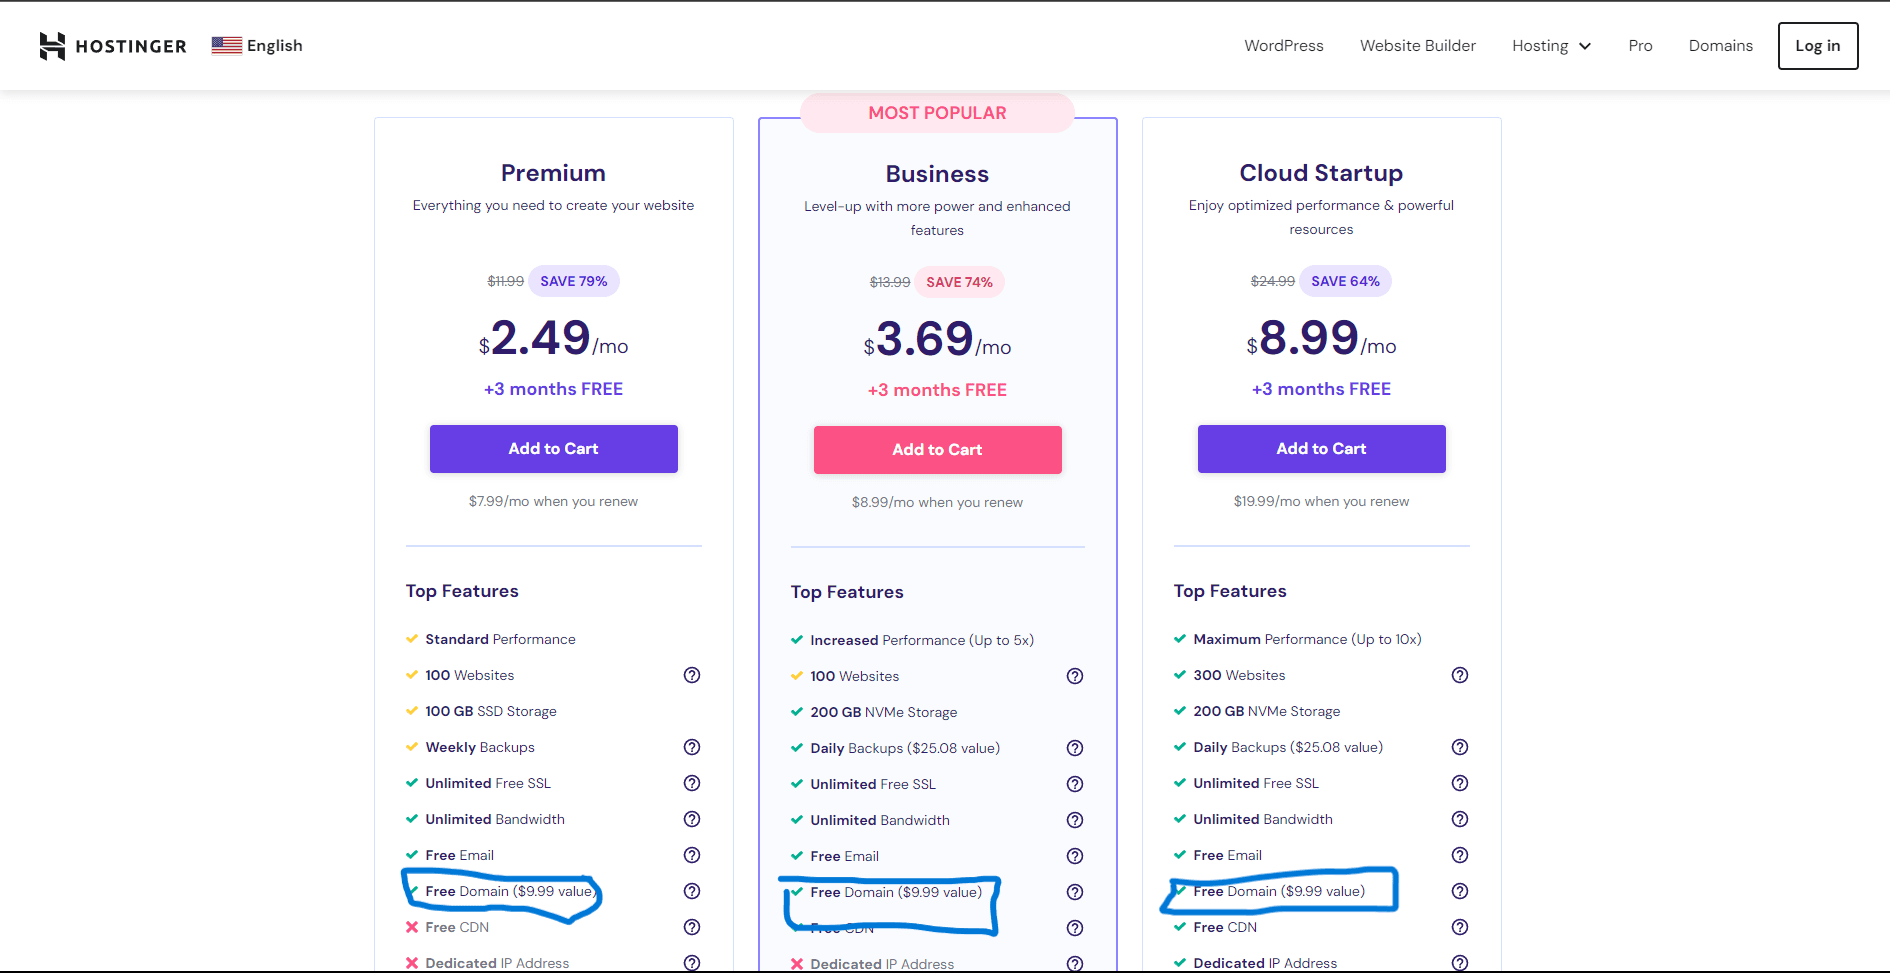
- Now on the home page you will see a list of web hosting plans Select a web hosting plan by clicking on Add to Cart, Make sure there is Free Domain listed in the features section of that plan.
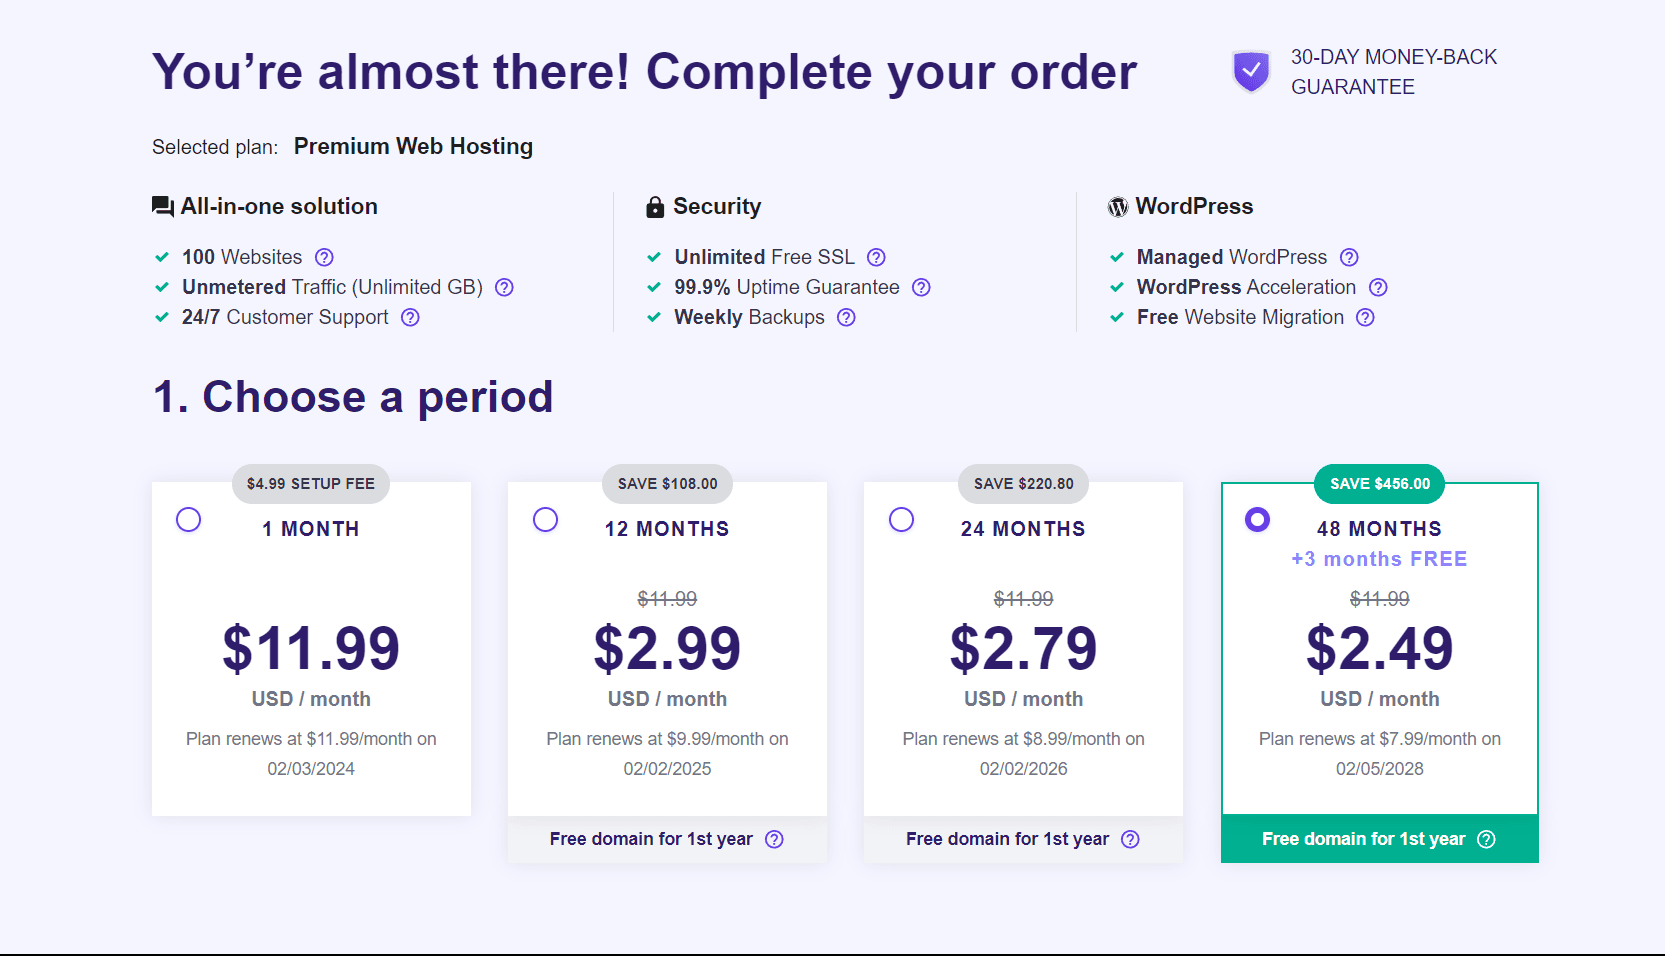
- Now it will redirect you to the checkout page, In this page you will see first it will ask you to choose a period like how many months plan you want to buy. I will recommend you to go with 12 months plan
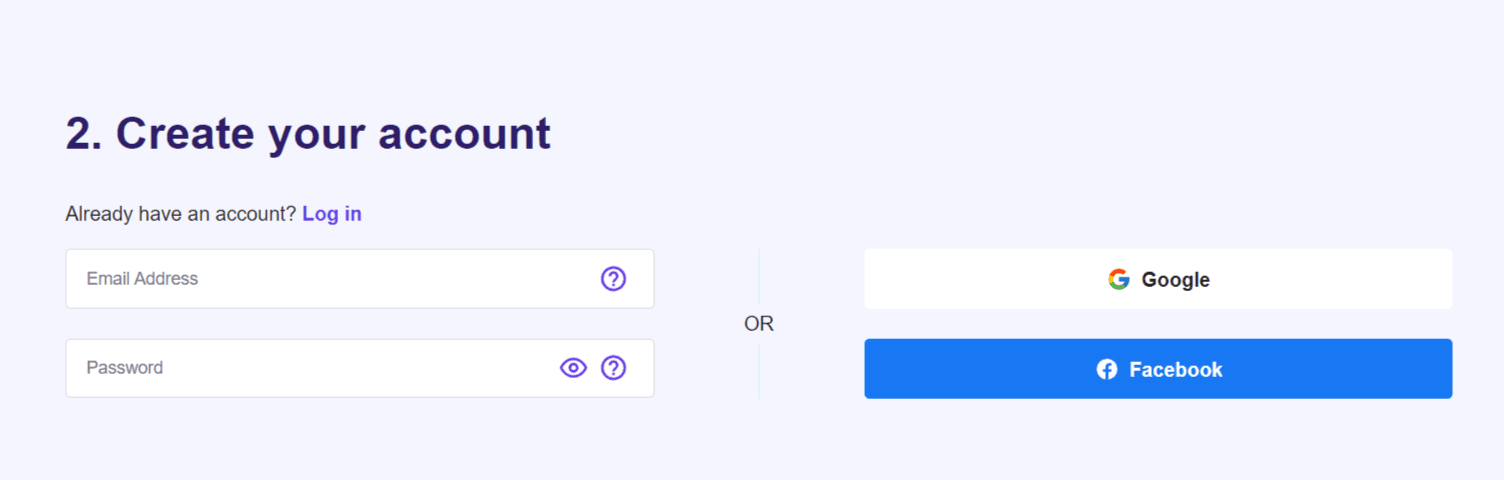
- Now you need to create a account or login if you previously have one which most of you will not so you can create a account by entering your email and a password or use google or facebook authentication.
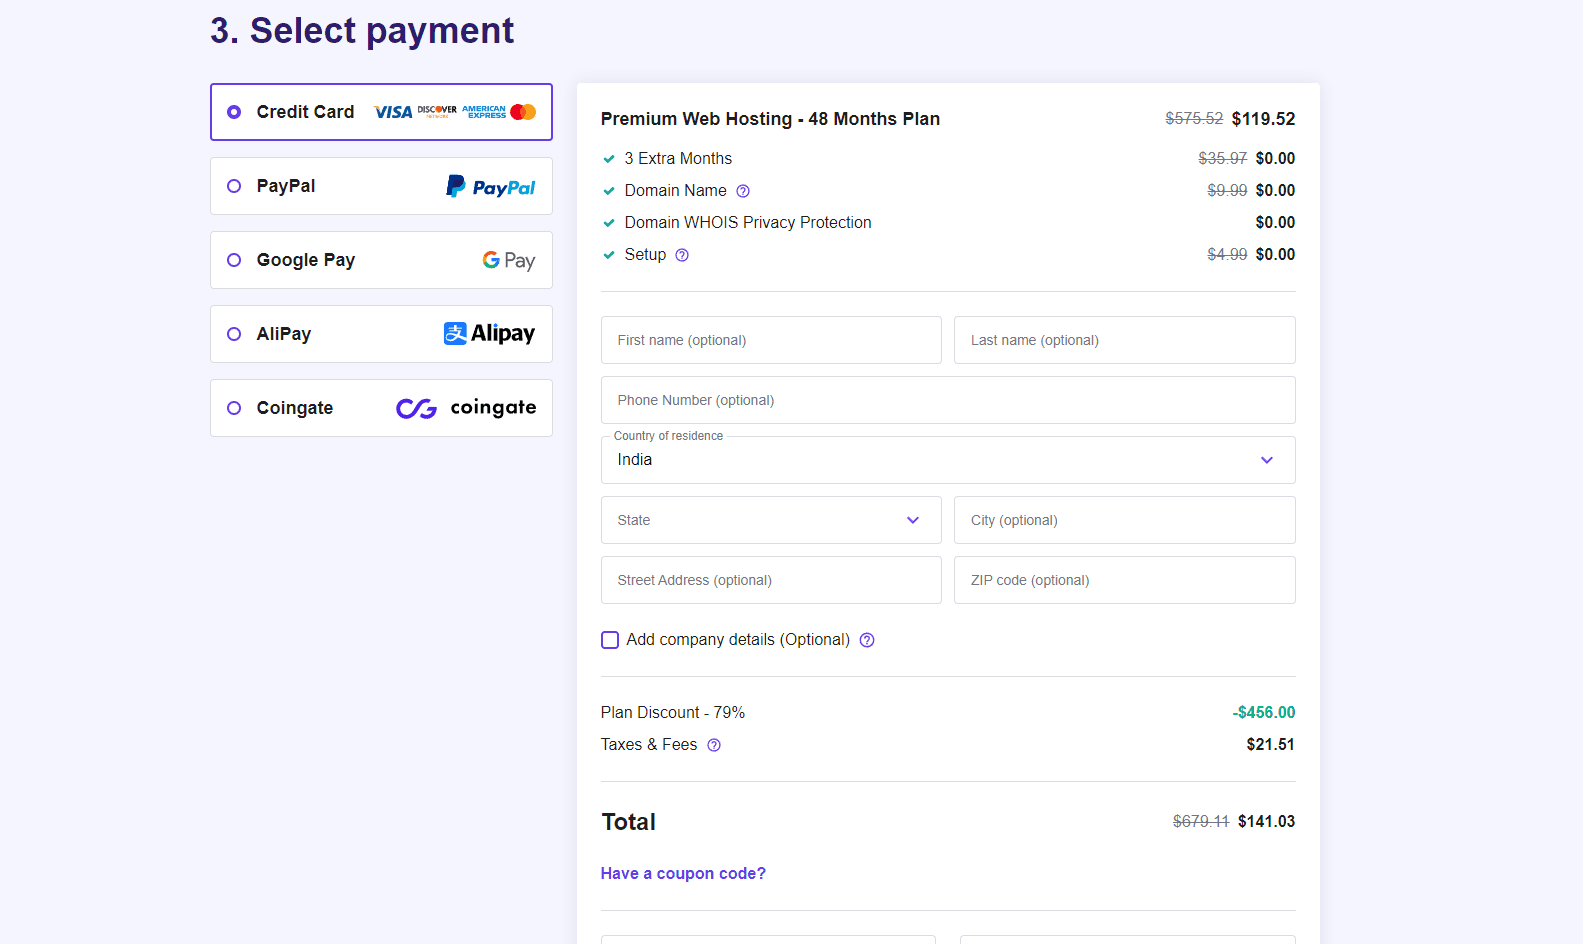
- Now it will display total cost you need to pay so you need to select a payment method, you can also apply a coupon code. Here is a special hostinger coupon code for you: COUPONSPAGE it will get you around 5% to 10% discount. You can also check the full Hostinger coupon codes page for the latest deals before completing your payment process.
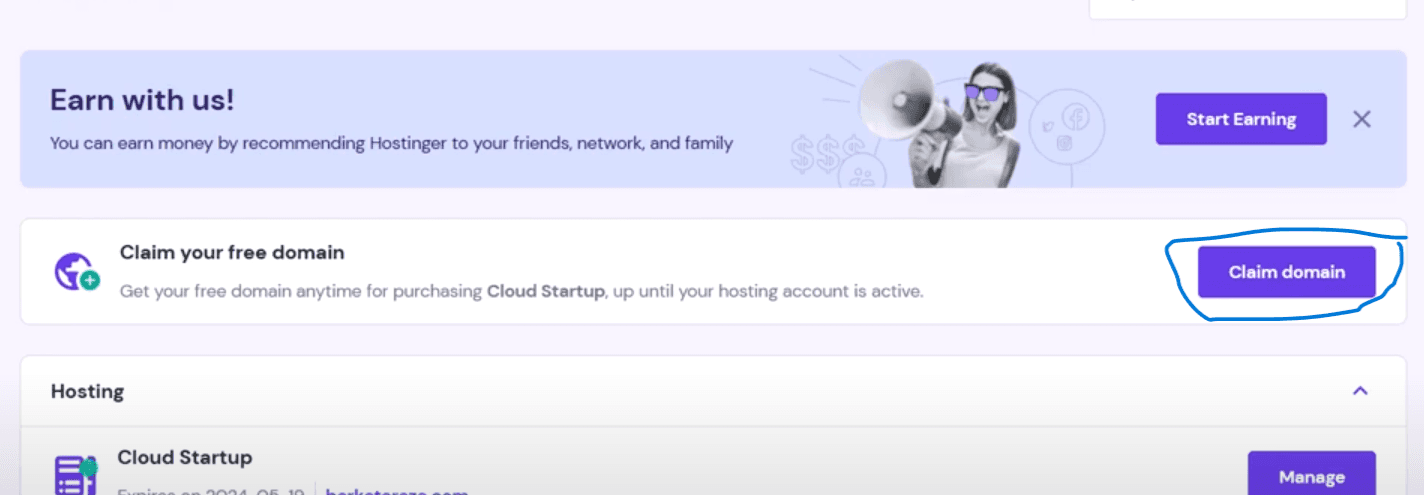
- After completing the payment process, you will need to login to your account with the credentials you created the account with, It will open Hostinger panel where you will see a Claim your free domain option so click on it.
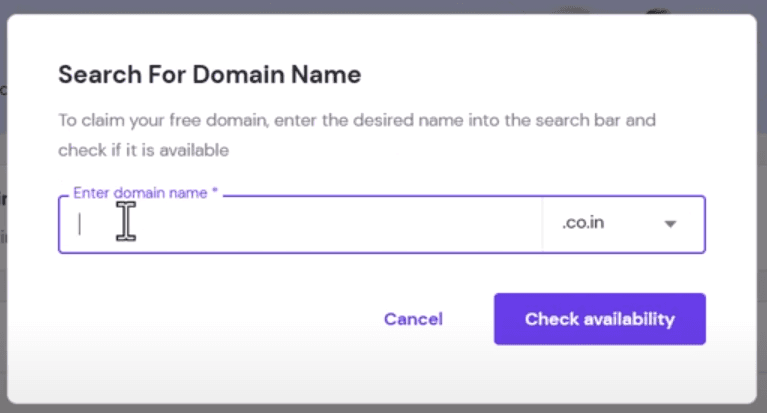
- Enter the domain name you want with the tld, click on check availability and if available then claim domain.
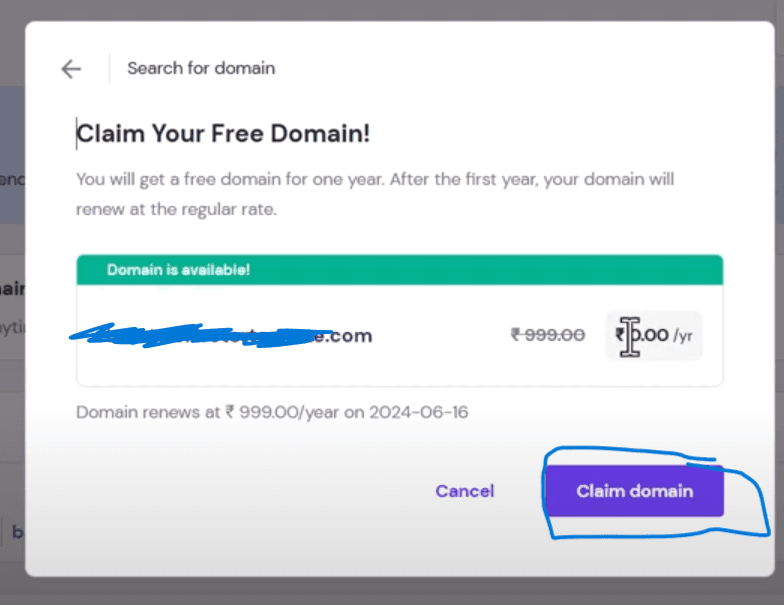
Now you successfully got a domain which you can use with your hosting to host a website. So this was everything for this tutorial I successfully showed you how to buy hosting and a domain from Hostinger.
If you just want to buy a domain from Hostinger without hosting then you can go to Hostinger domains.
If you are still deciding which plan to choose before checkout, read this Hostinger Premium vs Business comparison.
Also Read: How to install wordpress on Hostinger.
Thank you for reading, Happy Hosting 😊
About the author
I am Jarvis Silva, a tech enthusiast. I have 5 years of experience in website hosting and development, Now sharing all my knowledge related to web hosting and other various tech on the internet through Hostwizly.