How To Host PHP Website On Hostinger (2026 Guide)
Last Updated 13 September 2026 by Jarvis Silva
PHP powers over 75% of the dynamic web. Whether you are deploying a custom PHP/MySQL web app, an open-source portal, or a modern MVC framework, Hostinger's LiteSpeed-powered servers offer industry-leading PHP performance, one-click database management, and support for PHP 8.2+.
In this 2026 tutorial, we show you how to upload your PHP code to public_html, import your MySQL database via phpMyAdmin, and configure database credentials in minutes.
⚡ Quick Steps: Deploying PHP on Hostinger
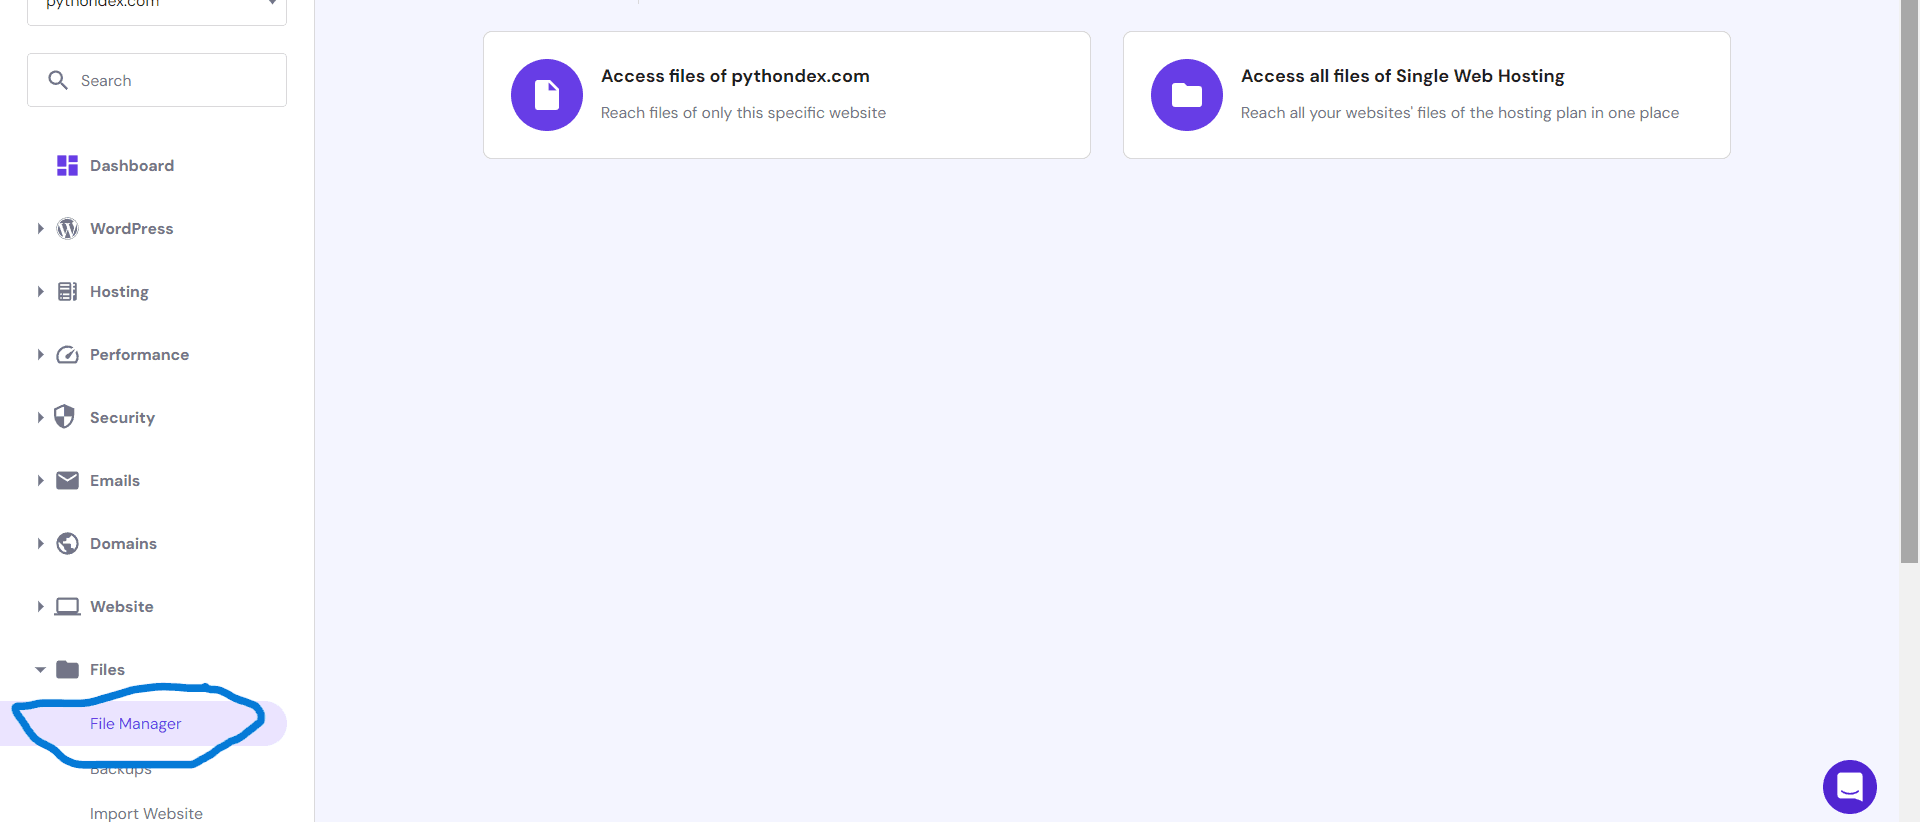
- 1Log in to Hostinger hPanel and open Files > File Manager.
- 2Upload your zipped PHP files to
public_htmland extract them. - 3Under Databases > Management, create a new MySQL database and import your
.sqlfile via phpMyAdmin. - 4Update your PHP database connection file with Hostinger's database name, user, and password (host:
localhost).
Hostinger PHP Hosting: Up to 75% OFF + Free Domain
Run your PHP scripts on high-speed LiteSpeed web servers with OPcache, MySQL databases, unlimited free SSL, and daily backups from just $2.49/mo.
1. Upload Your PHP Files via File Manager
- Log in to your Hostinger hPanel account, select your website, and open Files > File Manager.
- Open the
public_htmlfolder. Compress your project into a.zipfile on your computer and upload it. - Right-click the ZIP archive in File Manager and select Extract. Make sure your entry file (
index.php) sits directly insidepublic_html.
2. Create and Configure MySQL Database
If your PHP application uses MySQL or MariaDB to store users, articles, or orders, set up your database in hPanel:
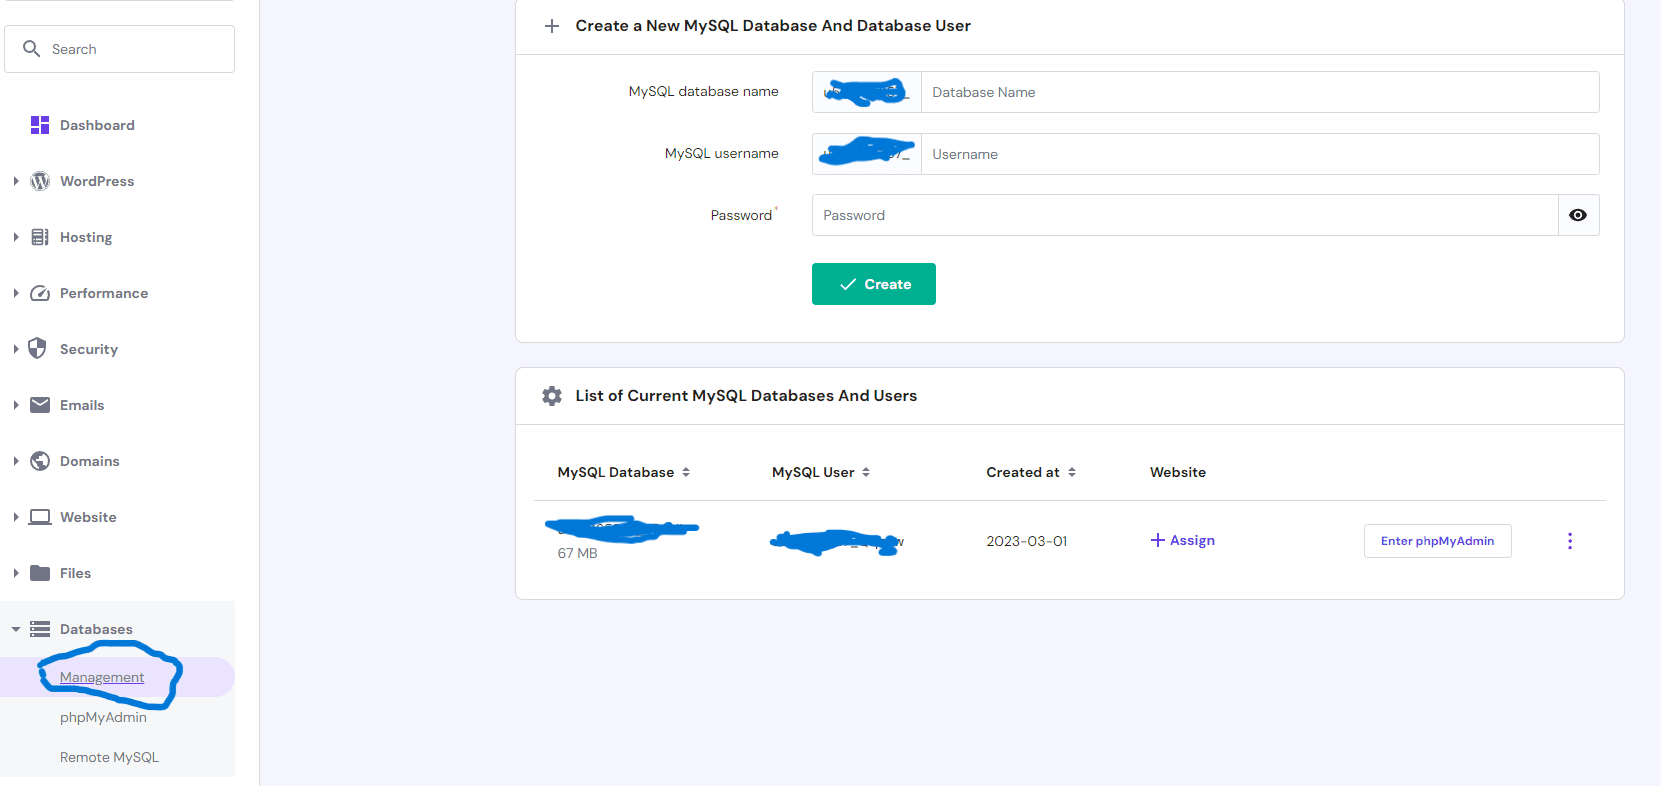
- Navigate to Databases > Management in hPanel.
- Fill in:
- MySQL Database name: (e.g.,
u123456789_app) - MySQL Username: (e.g.,
u123456789_admin) - Password: Generate a strong database password
- MySQL Database name: (e.g.,
- Next to your new database, click Enter phpMyAdmin to import your database tables using the Import tab.
- Open your database connection script (e.g.,
config.phpordb.php) in File Manager and update:
// PHP MySQL Database Connection in Hostinger
$host = "localhost";
$db_name = "u123456789_app";
$username = "u123456789_admin";
$password = "YOUR_DATABASE_PASSWORD";
$conn = new mysqli($host, $username, $password, $db_name);
3. Configure PHP Version & Memory Settings
Hostinger gives you full granular control over PHP modules and environment variables:
- Go to Advanced > PHP Configuration in hPanel.
- Under the PHP Version tab, choose PHP 8.2 or PHP 8.3 for maximum security and execution speed.
- Under the PHP Options tab, you can enable common extensions like
curl,gd,mbstring, andopenssl.
Frequently Asked Questions
Which PHP versions are supported on Hostinger shared hosting?
Hostinger supports modern PHP versions including PHP 8.1, 8.2, 8.3, and 8.4, as well as legacy versions (PHP 7.4). You can switch PHP versions with one click in hPanel under Advanced > PHP Configuration.
Can I host a Laravel or CodeIgniter PHP framework website on Hostinger?
Yes! Hostinger shared hosting fully supports Laravel, CodeIgniter, and custom PHP applications. You just need to set the public directory as the root folder in hPanel or configure an .htaccess rewrite rule.
Where is the MySQL database host for PHP in Hostinger?
For almost all shared hosting accounts on Hostinger, your MySQL database host is simply 'localhost'. You do not need to enter an external IP address.
How do I increase PHP memory limit or upload_max_filesize on Hostinger?
In hPanel, navigate to Advanced > PHP Configuration > PHP Options tab. Here you can adjust memory_limit (up to 1024M), upload_max_filesize, max_execution_time, and post_max_size with zero coding required.
Related Tutorials:
About the author
I am Jarvis Silva, a tech enthusiast. I have 5 years of experience in website hosting and development, Now sharing all my knowledge related to web hosting and other various tech on the internet through Hostwizly.
